Making Our First Glogs
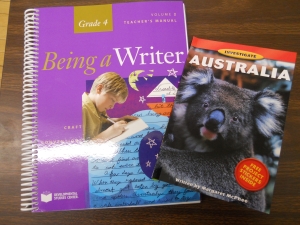
 One of my goals for this school year was to learn how to make a Glog. I had heard about them, and seen a few, from others on Twitter, which is where I get most of my technology ideas. It took me a while to get around to doing it, though. I have been gradually working my way through the new Being a Writer materials. This is our first year with these materials. In March we began a new unit on writing non-fiction. The first project was to research and write about countries around the world. This seemed like the perfect place to try out the Glogs.
If you aren’t familiar with a Glog, it is an on-line poster. You create a Glog on the GlogsterEdu website. They can be embedded into wikis and blogs. As I read about GlogsterEdu from others in my PLN, I was very intrigued. With advice from others, I watched a couple YouTube videos to learn how to do this, and I created a sample poster to show to my students. I had the kids partner up to get things started, but ultimately each student made their own glog.
We started out with pencil and paper. We did our research by reading library books to learn about other countries. Students were able to choose whatever country they wanted, and several chose the same country. I created a organizational web so students could collect and organize their information before we moved to the computers.
When I began to look at the developing Glogs, I realized that some kids were into adding lots of unrelated animated graphics, but were not including much content. At this point I created a Making a Glog poster with my expectations and a checklist for students to use as they edited their work. Later, I used this checklist as a rubric to evaluate our finished Glogs. Check out my file cabinet for PDFs of these documents.
This turned out to be a really wonderful project, and I was very impressed to see what the kids did with it. Their Glogs were way better than mine. They figured out how to find and embed photos and links in their Glogs. To make it easier for people to see our work, I created a wiki for this project and embedded all the Glogs. I also embedded the Glogs on each student’s Kidblog.
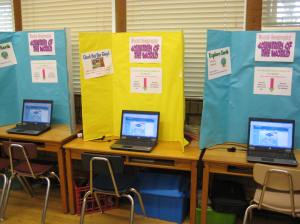
We had Core Knowledge Night, which is an open house type event, on May 5th. One of the problems with on-line projects is being able to display them for visitors to see. I set up three laptops with display boards. I also talked to the class about showing their work to their parents and other visitors. We had lots of people that took the time to see our work.
I will definitely be using Glogs in the future. The kids really enjoyed making them. It was a great way to demonstrate their learning. I also found that several students who often struggle academically really excelled with this project.
Our Castle Project for 2011
This school year I have been writing and posting on my new blog, Day In the Classroom. I recently realized that some people are still visiting this blog, so I am going to double post to both blogs. This post includes some material from a post last year about the castle project that I do with students.
Phillips is a Core Knowledge School. We are also a public school, so we teach the regular school district curriculum, and in addition we teach most of the Core Knowledge Content. Core Knowledge is based on the writings of E. D. Hirsch, author of Cultural Literacy. You can learn more about it by visiting the Core Knowledge Foundation Website.
Our first graders learn about ancient Egypt, the third grades can tell you about the Roman empire, and in fourth grade we learn about the Middle Ages. As part of our study, my students build castles. We completed our castle project last week. It is completed as a homework project, and it is one of the highlights of fourth grade, or so some people tell me.
I have done this project for fourteen years. I did quit for a few years because the castles had become so elaborate and huge, and they had become “Dad Castles” instead of “Kid Castles”. I make it a point to tell families that they may assist, but it should be mostly the child’s work. When students bring their castles, we always interview them about how they planned and built their castle. When asked what they liked best about the project, many respond with something they did with their parents, so I do allow family help.
I have restrictions about the size of the final castle. It had gotten to the point that some castles were the size of two or three student desks. I now request that they are no larger than the top of a student desk.
Because I didn’t want to cause a hardship for any family, for a few years I offered the option of making a poster instead of a model. Only one or two students per year ever chose to do that. When other students asked them why they made a poster rather than model, the answer was that they thought it would be easier. Since I don’t want to offer a “lazy option”, I dropped that this year.
We begin in class by learning why castles were built, and how they were built. Castles weren’t just houses, they were war machines. We learn about the planning that went into the defense of these castles, and children are encouraged to include these details in their models.
I am a big consumer of manilla folders, and I use them for this project. I staple step by step directions for the project on the left side of the folder. You’ll can find a copy of these directions in the file cabinet. On the right side I include diagrams labeling the parts of the castle. We do several in-class lessons about the parts of the castle, and whether it was for offense of defense. I also include ideas about possible ways to construct a model. Most of my ideas come from the books, Knights And Castles, By Teacher Created Materials and The Middle Ages Independent Learning Unit, By Lorraine Conway. You can read more about the resources I use in my previous post on this blog, titled Medieval History for Kids.
The kids and families never cease to amaze me with their creativity. I have seen castles made of wood, cardboard, styrofoam, sugar cubes, marshmallows, sand (that was not such a good idea), clay, craft sticks, and rocks. Every year, there is some new idea that I would never have thought of and have never seen before. This year one of my girls brought the mold that they used to make all the blocks that they built the castle from. She explained to us how she mixed the “cement”, formed the blocks, removed them from the mold, and let them dry. It was fantastic.
We do a lot of writing. We write about why castles were built. We write about the kids’ thinking and planning for their castle. Kids write a description of their work to be displayed at Core Knowledge Night. At the end we write fairy tales about what happens when an evil wizard shrinks us and our castles become real.
On the day the castles are due, we invite students from other grades to come see them, which is why kids come into 4th grade asking when we’re going to build castles. All the castles pictured in this post were created by my students from this year. I made this Animoto to celebrate our castles and Core Knowledge Night.
Our castles were due Wednesday, May 4th, which was the day before we had our big school celebration, “Core Knowledge Night”. Now we have them displayed in the office, library, and above our lockers.


